
GoHighLevel Setup Guide
GoHighLevel Setup Guide for a New Sub-Account
A new sub-account in GoHighLevel should be set up in the right order. If you start building campaigns before your profile, channels, and contacts are ready, problems show up fast. Use this practical guide to complete the essentials, avoid common mistakes, and build a system that is ready for leads, conversations, and payments.
Profile Setup
Before you add contacts or send anything, check your account settings. This is the base of your whole setup.
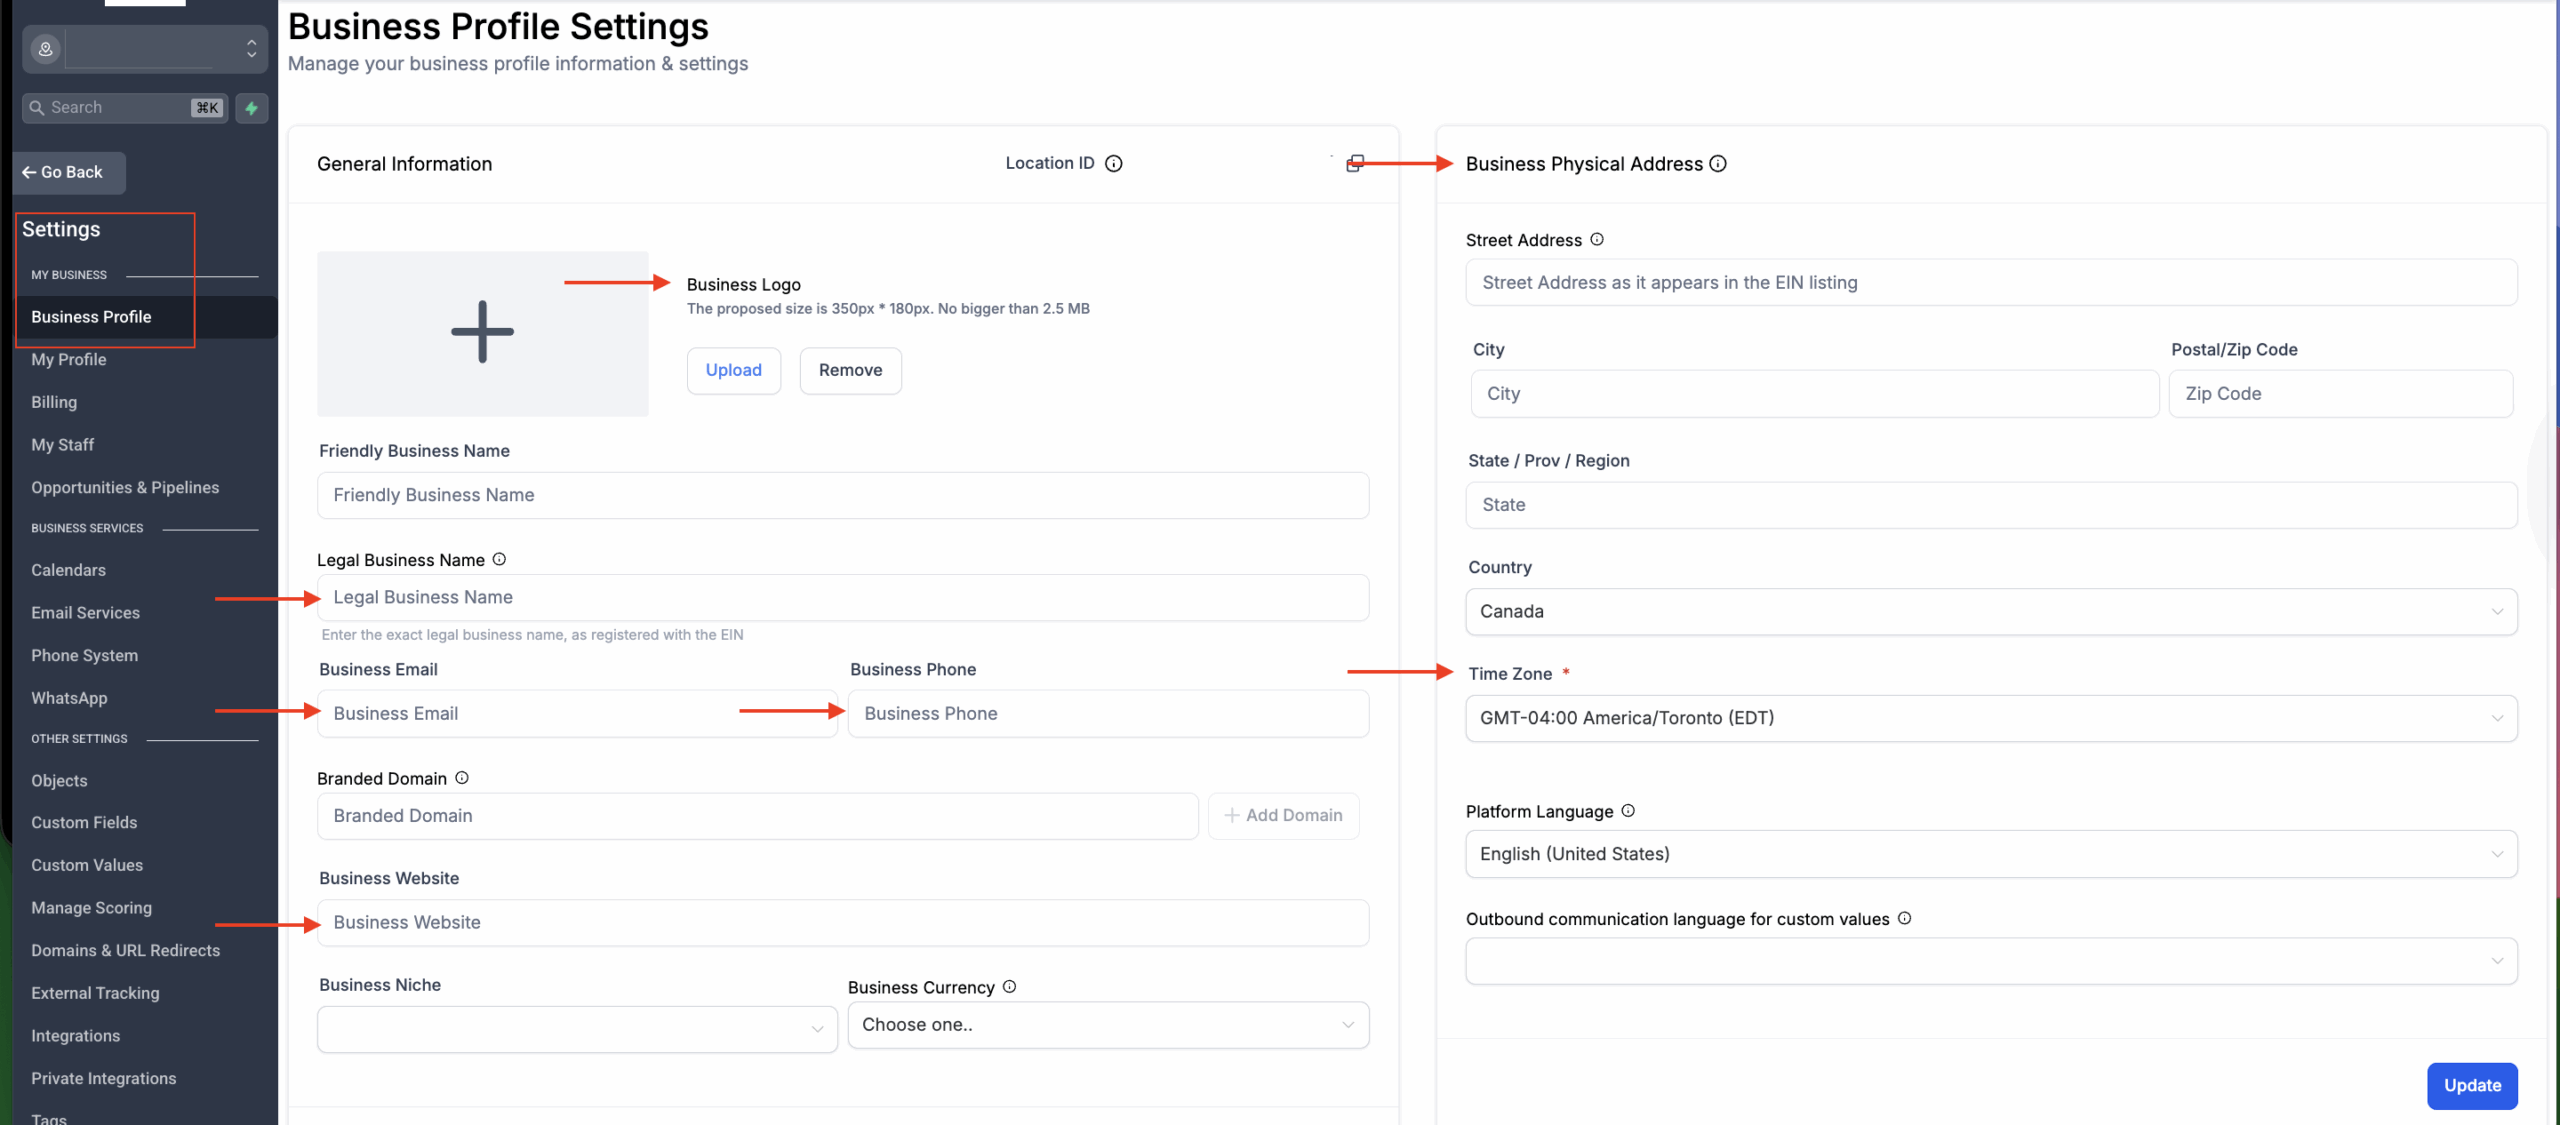
Go to Settings.
Upload your business logo, ideally 350 x 180 px.
Add your business name, business email, and business phone number and business website.
Add your physical address if available.
Set the correct timezone and currency.
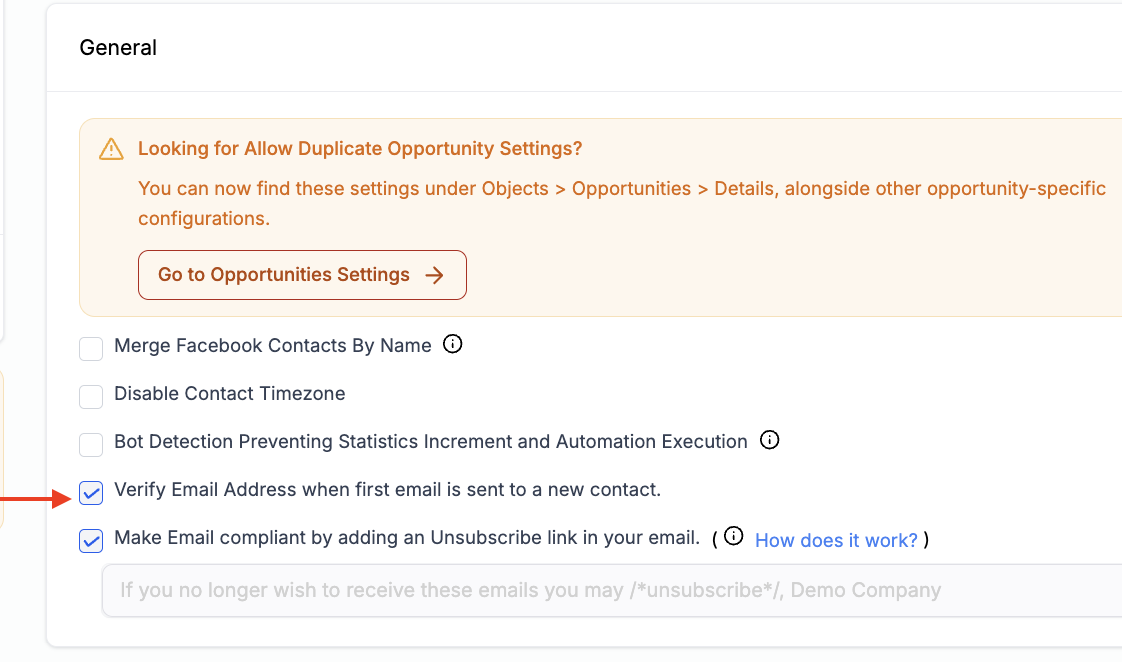
Turn on Verify Email When First Sending. This setting is off by default, but turning it on is highly recommended for long-term email domain health.
Tip: Review your company details for invoices, emails, and forms, and add team members only if needed.
If these settings are wrong, your emails may look unprofessional, your timing can be off, and your account will be harder to manage later.
Contacts Setup
Contacts are the center of your account. Every message, campaign, note, and opportunity starts here. Before you do any marketing, make sure you know how to manage your contact list.
Create a New Contact
This is the fastest way to add a lead manually.
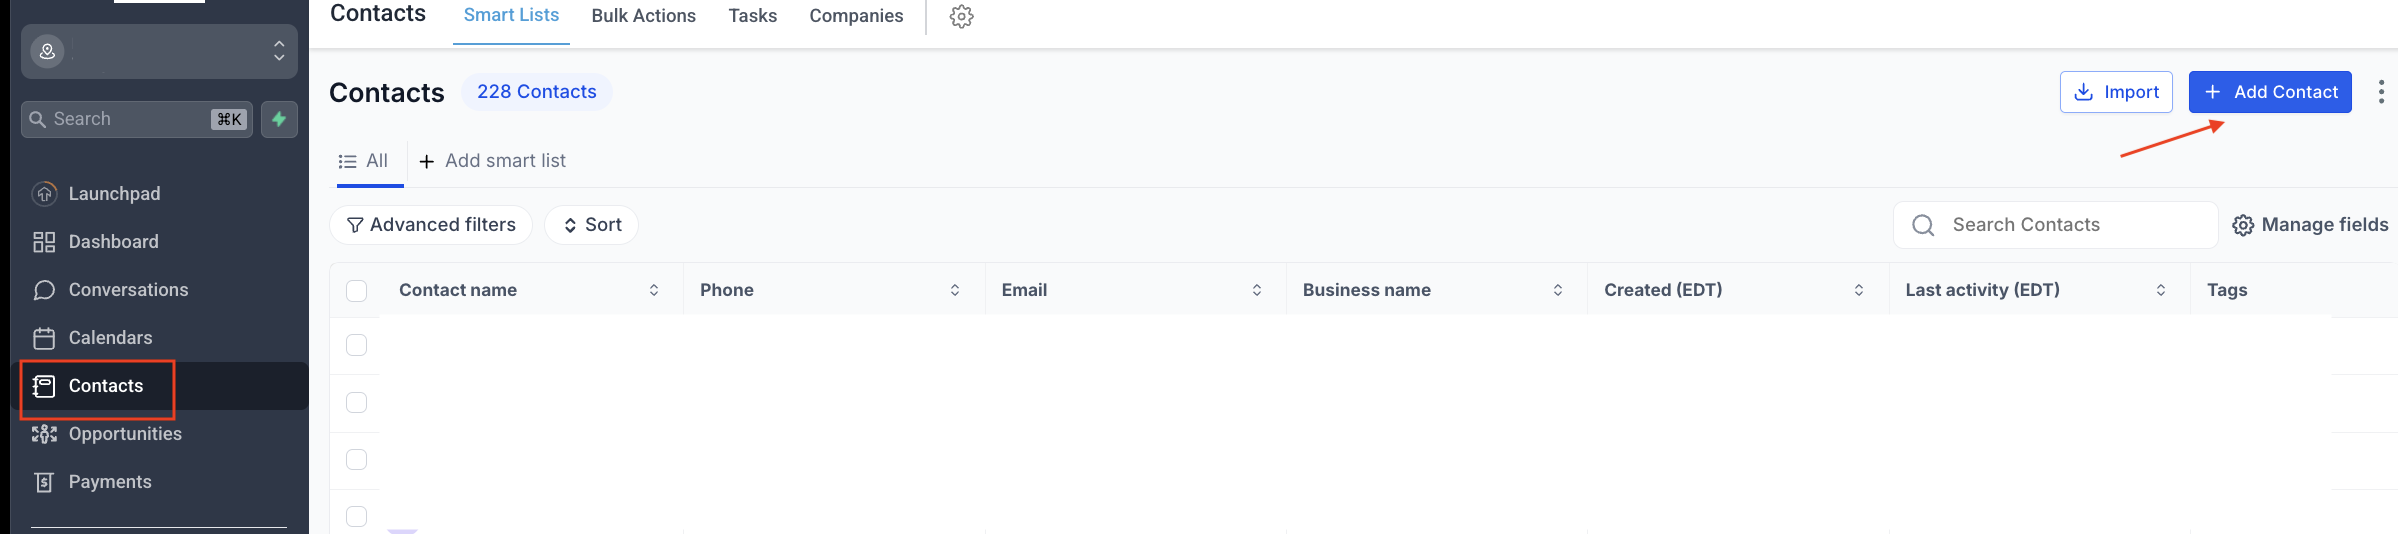
Go to Contacts.
Click Add Contact.
Enter the name, email, and phone number.
Add any extra details you have.
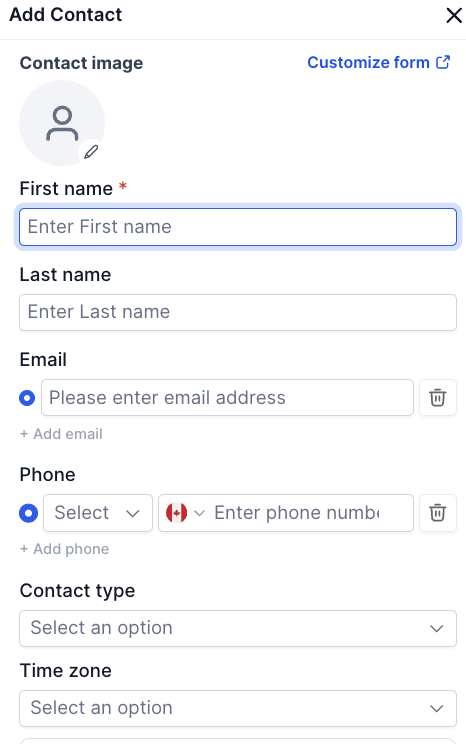
Contact details
Click Save.
Tip: When a form or survey is completed by a new lead, GoHighLevel automatically creates a new contact.
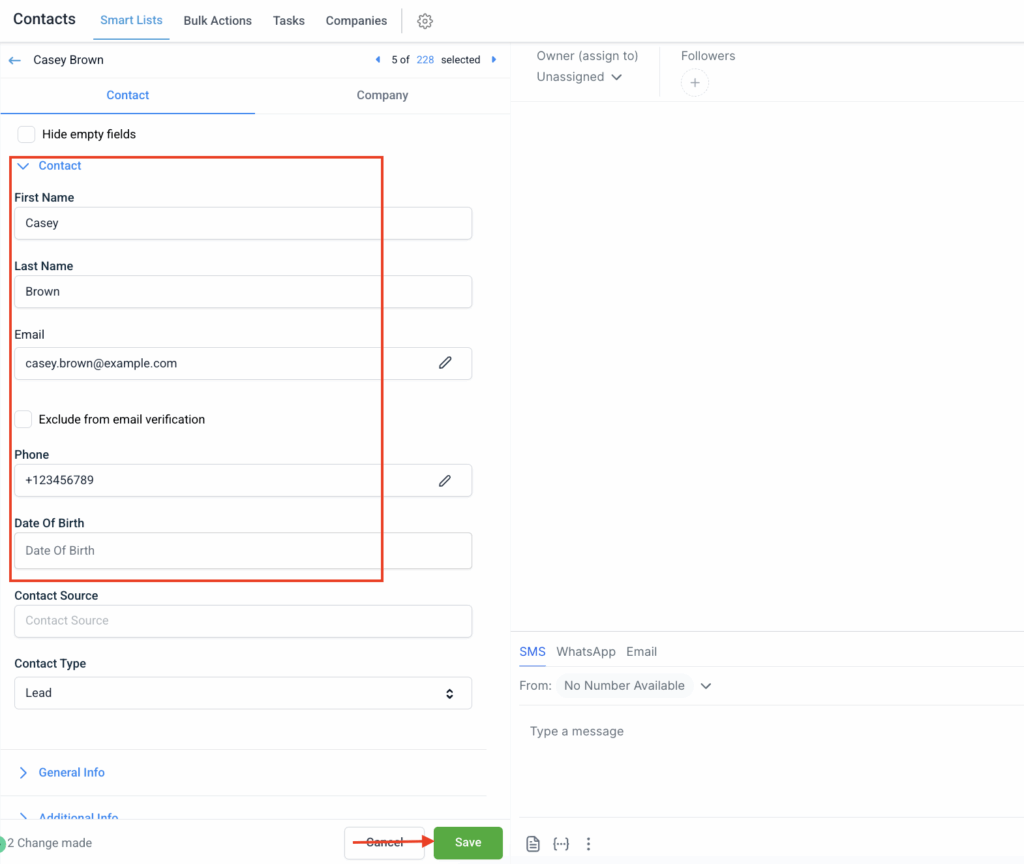
Edit an Existing Contact
You will often need to update information after a call, email, or new inquiry.
Go to Contacts.
Click the contact row.
Open the contact card.
Update the needed fields on the left side.
Click Save.
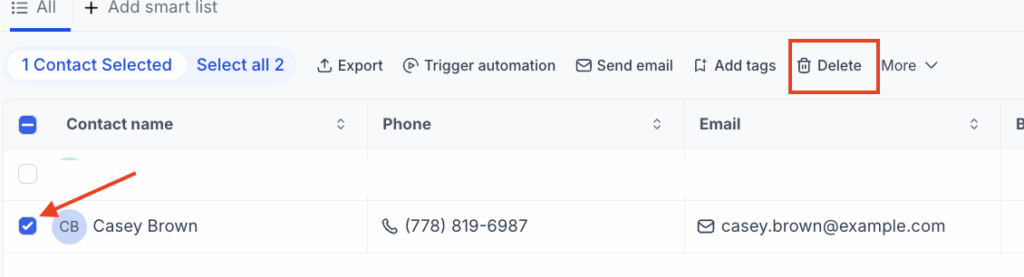
Delete an Existing Contact
Only delete a contact if you are sure, as this removes more than just the record.
Select the checkbox next to the contact.
Click Delete.
Type DELETE in the confirmation window.
Click Delete again.
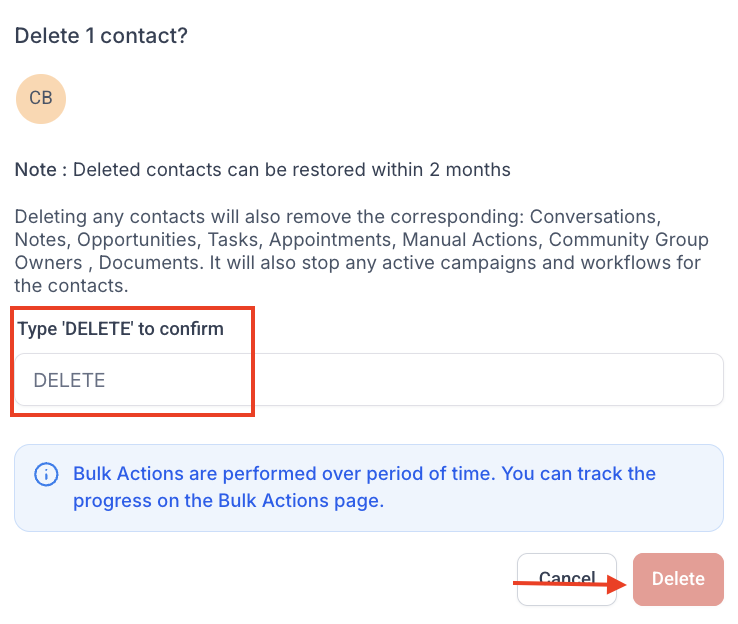
Tip: Deleting a contact also removes related conversations, notes, opportunities, tasks, appointments, and active workflows. Deleted contacts can usually be restored within two months.
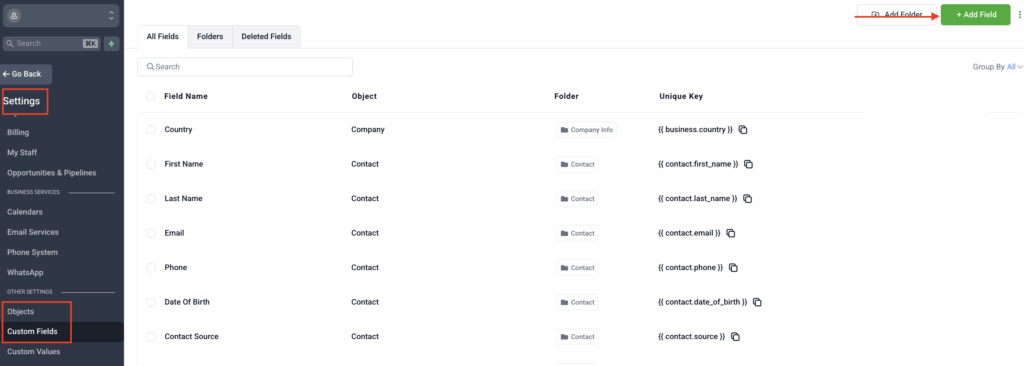
Create New Custom Fields
If the standard fields are not enough, create your own.
Go to Settings > Custom Fields.
Click Add Field.
Choose a field type such as text, dropdown, or date.
Enter the field name.
Add any details like placeholder or group.
Click Save.
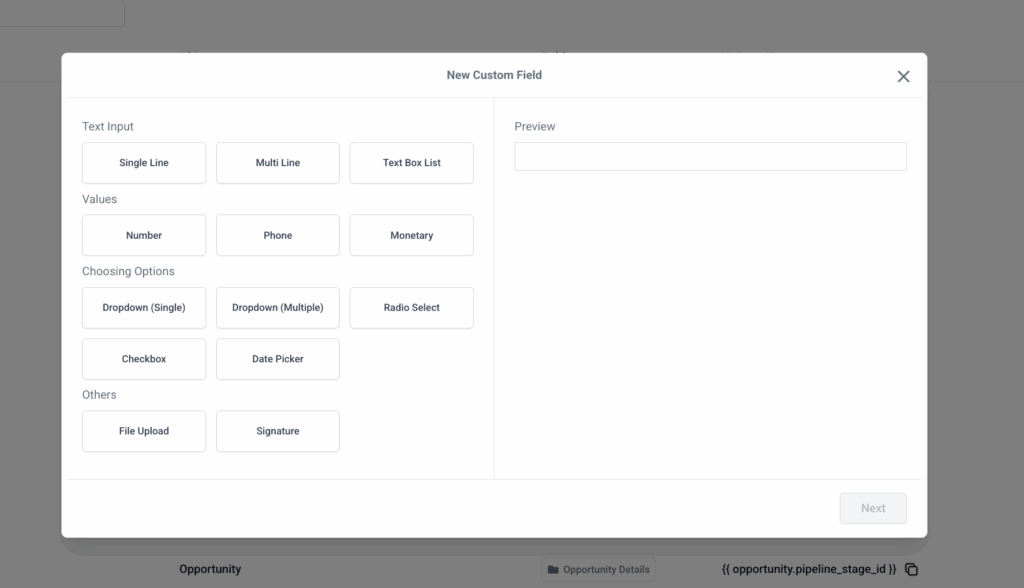
Tip: Use custom fields for things like service type, lead source, budget, city, or internal status.
Import Existing Contacts
If you already have leads or clients in another system, import them before starting campaigns.
Go to Contacts.
Click Import Contacts.
Upload your CSV file.
Match each column to the correct field.
Add tags if needed.
Start the import.
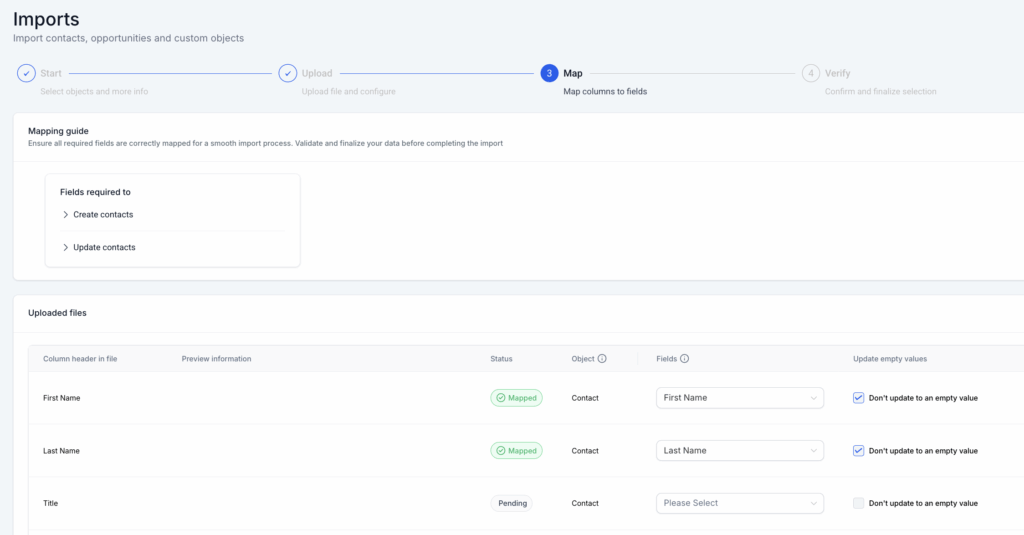
Before importing, check this:
- Remove duplicate contacts
- Remove invalid emails
- Make sure phone numbers are formatted properly
- Review column names before upload
Tip: A clean import makes the rest of your CRM setup much easier.
Email, Phone, and SMS Setup
Before you send campaigns or reply to leads, your communication channels need to work properly. This should be done early.
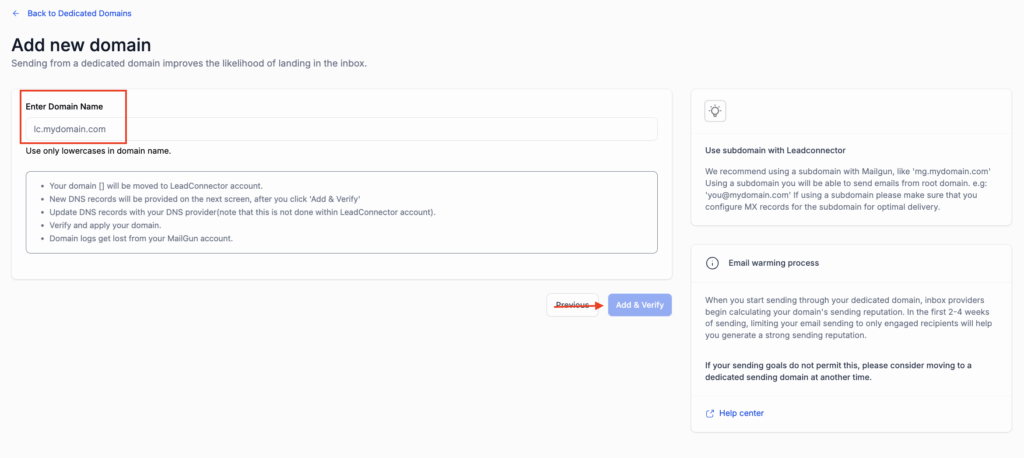
Email Setup
Go to Settings > Email Services.
Connect your sending email or domain.
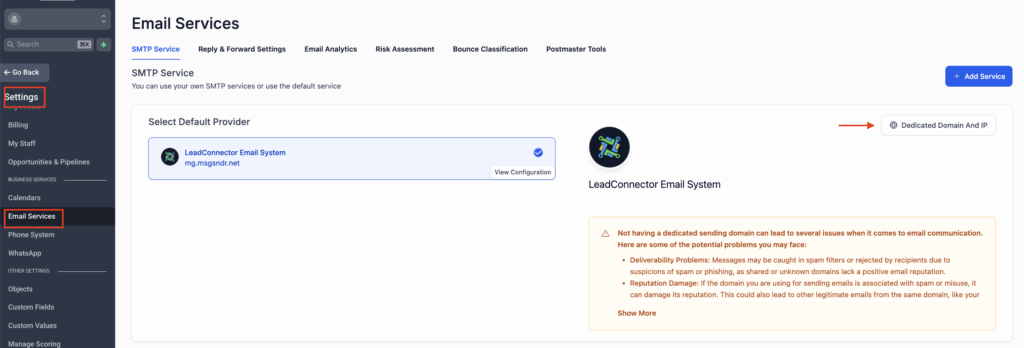
Verify the domain if needed.
Send a test email to yourself.
Phone and SMS Setup
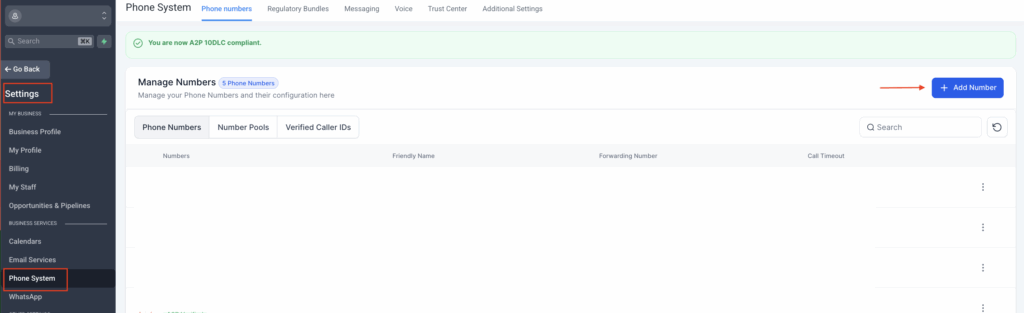
Go to Settings > Phone System.
Add or purchase a number.
Send a test SMS.
Make a test call.
Tips:
- Apply for A2P 100DLC Compliance
- Test everything before launching a campaign
- Do not send messages too often, always send during reasonable hours, and make sure the contact has opted in where required
Social Planner Setup
The Social Planner helps you stay active without posting manually every day. Keep the setup simple in the beginning.
Go to Marketing > Social Planner.
Connect your social accounts.
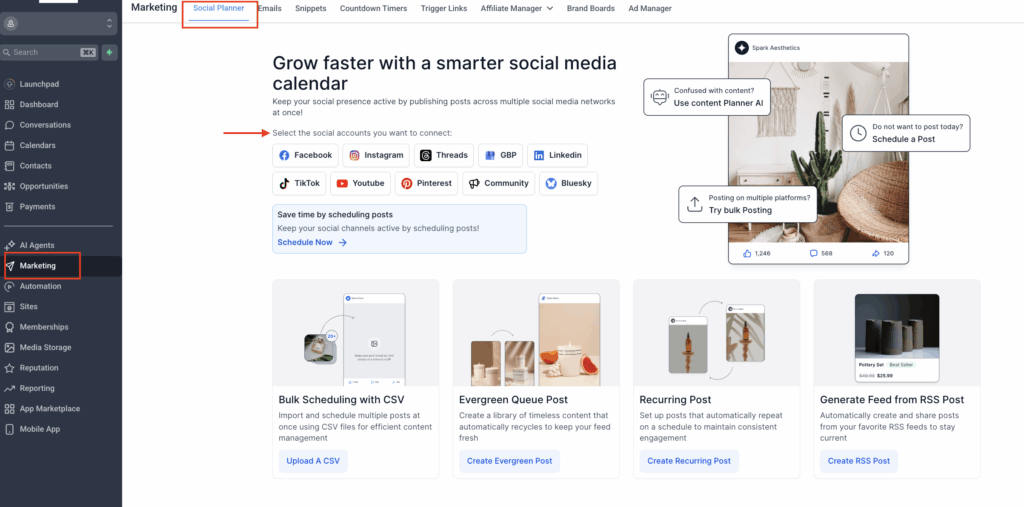
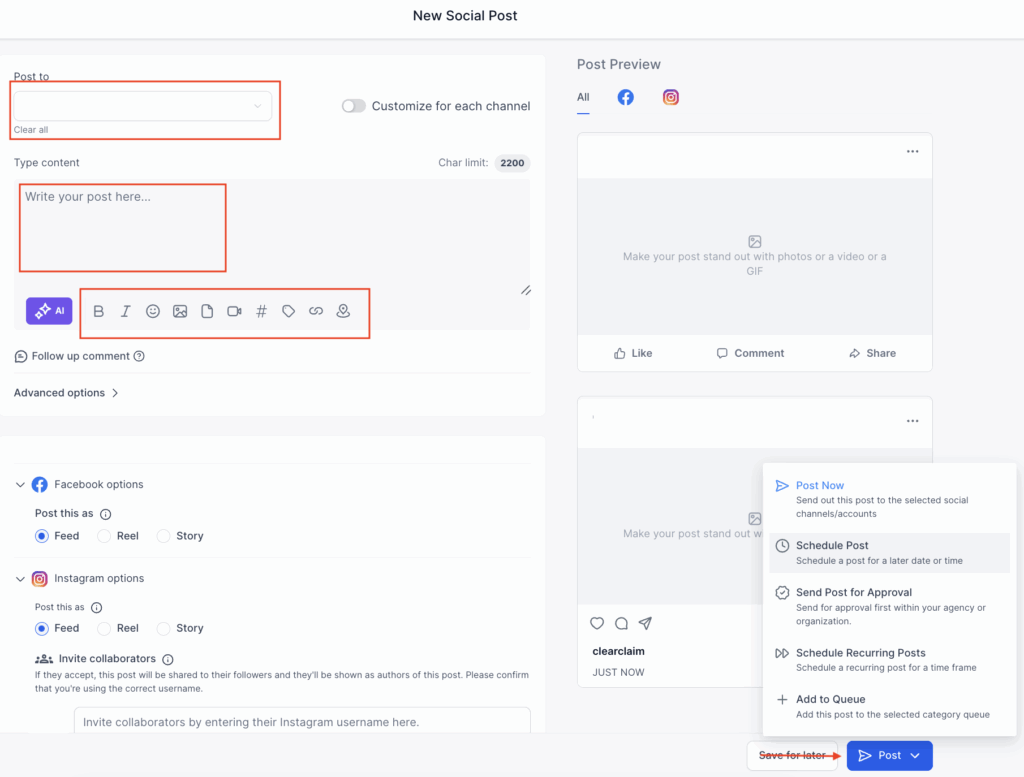
Create your first post.
Choose the date and time.
Schedule the post.
Tip: Start with one or two posts per week. The goal at this stage is consistency, not volume.
Conversations and Sales Channels
One of the main benefits of GoHighLevel is having your messages in one place. This improves speed and keeps your team organized.
Connect Personal Inbox
Go to Settings > Email Integration.
Connect your inbox.
Follow the prompts to authorize access.
Test by sending and receiving an email.
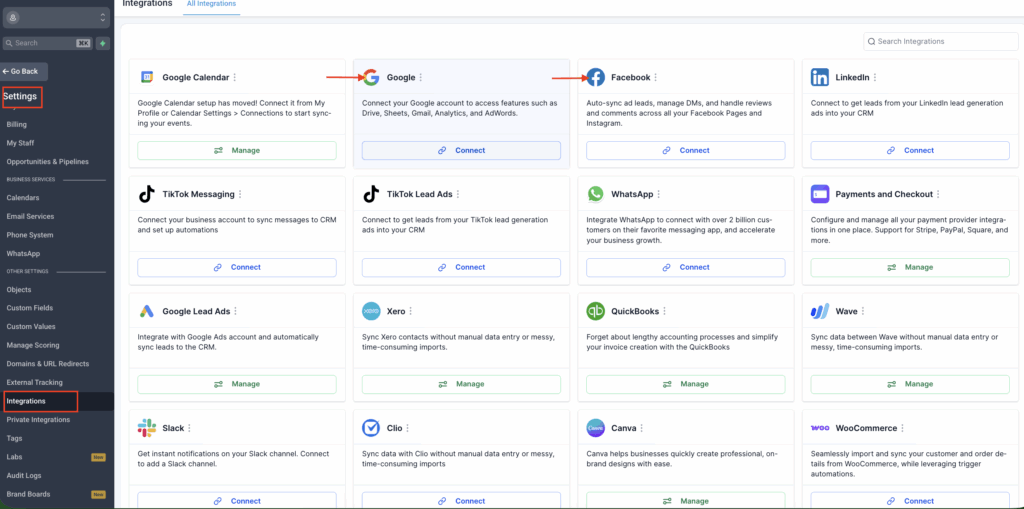
Set Up Facebook and Instagram Messenger
Connect your Facebook and Instagram accounts.
Turn on Messenger integration.
Check that messages appear in Conversations.
Send a test message from each platform.
Tip: This stage helps centralize communication. Connect any additional platforms to manage all your conversations from a single, centralized inbox.
Final Setup Checklist
Before you start using the account daily, do one final check:
- Your business profile is complete
- Your logo is uploaded
- Your timezone is correct
- Your email is verified
- Your phone and SMS work
- At least one contact is added
- Custom fields are ready if needed
- Your contact import is clean
- Your first email campaign is tested
With the right setup in place, GoHighLevel becomes much easier to manage and far more effective from day one. By completing these core steps in the right order, your sub-account will be ready to organize contacts, support follow-up, launch campaigns, manage conversations, and collect payments with less confusion and fewer issues.
Interested in taking your GoHighLevel to the next level? Read our article, GoHighLevel Integration & Implementation, to see how the right setup, integrations, and workflows can turn the platform into a more practical system for managing leads, communication, and operations.
A basic GoHighLevel setup can usually be completed in a few hours if you focus on the essentials first. That includes updating your business profile, adding or importing contacts, connecting email and phone channels, and setting up your first campaign. More advanced configurations, such as automations and integrations, may take longer depending on how your business operates.
Start with your account basics before using any marketing or sales features. That means adding your business name, logo, email, phone number, timezone, and currency, then verifying your email settings. After that, move into contacts, communication channels, and campaigns. This creates a much cleaner foundation for your GoHighLevel onboarding.
Yes, you can start by adding new contacts manually, but importing your existing contacts is usually the better approach if you already have a database. It saves time, keeps your records in one place, and helps you begin your GoHighLevel CRM setup with a more complete contact list. Just make sure your file is clean before importing.
You do not need to connect every channel on day one, but you should connect the communication tools you plan to use immediately. If you want to send email campaigns, email setup should come first. If your follow-up relies on texting or calls, phone and SMS setup should be done early as well. A proper GoHighLevel marketing setup depends on having the right channels active and tested.
Basic setup covers the essentials needed to start using the platform, such as profile settings, contacts, communication channels, campaigns, and payments. Full implementation goes further by aligning GoHighLevel with your real business processes, integrations, workflows, and data structure. That is where a broader GoHighLevel implementation guide becomes valuable, especially for businesses that want the platform to function as a complete operational system.