
How to Run Facebook Ads In 2026 (Full Beginners Guide)
If you’re new to Facebook marketing, the platform can feel overwhelming, because it is. The good news is you don’t need to master every setting to launch profitable Facebook advertising in 2026. You just need a clean setup, one clear goal, a simple audience, strong creative, and proper tracking.
This 2026 Facebook ads guide for beginners walks you through the exact steps a Facebook ads expert would follow when managing your first campaign. We’ve written this article thinking of people like you, business owners in Toronto, Canada, who want results without guesswork.
Why Should You Advertise on Facebook?
Facebook ads work well because they let you put your offer in front of the right people without needing a massive budget. You can start small, see what clicks, and make adjustments fast. If something is not working, you do not have to wait weeks to find out. You can pause it, tweak it, and relaunch with a better angle, a stronger message, or a different audience.
The real power kicks in once people have seen you before. Someone visits your site, watches a video, or engages with a post, then you can show them a follow-up ad that feels timely instead of random. That is where many businesses see the biggest gains, because you are not always paying to reach strangers. A Facebook marketing agency can help you set this up and keep it running smoothly, so your campaigns improve week after week instead of starting from scratch every time.
1. Set Up Meta Business Suite the Right Way
Before you touch Ads Manager, make sure you have a personal Facebook account (Meta uses it as the base for Business Suite). After that, you can start managing your business’s profile and ads inside Meta Business Suite.
Creating a Facebook Page
Next, create (or connect) your business Facebook Page. Meta Business Suite can guide you through it, or you can create it directly from your profile menu on Facebook.
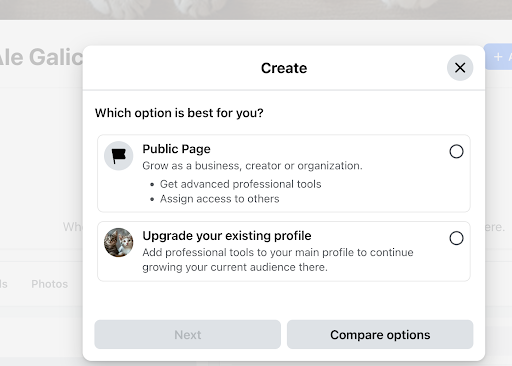
Don’t leave your Page empty. People can click your Page directly from your ads, and a maintained Page builds trust fast, especially when you are competing with other businesses for attention.
2. Open Ads Manager and Add Payment Details
Once your Page exists, open Ads Manager inside Meta Business Suite. You can find it by clicking on the left panel → Ads Manager → Account Overview.
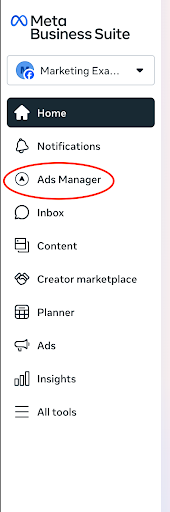
This is where you’ll create and manage Facebook marketing campaigns. Ads Manager will also prompt you to add payment details. This is important to do early so your ads can start running without delays.
If you’re planning to run campaigns for multiple businesses, keeping billing and access organized here is crucial for effective paid advertising and social media management.
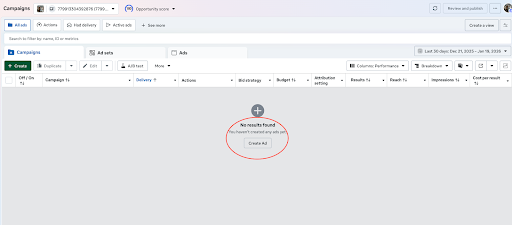
3. Create a Campaign and Pick the Right Objective
To build your first campaign, in Ads Manager, go to Campaigns (on the left panel), then click Create. Your campaign is the “container” that holds your ad sets and ads.
Think of this as a simple three-level structure for your Facebook ads management system: the campaign sets the overall direction (like a CEO), ad sets translate that direction into targeting, budget, and delivery choices (like managers), and individual ads are the creatives and messages doing the day-to-day work of winning attention and driving results.
Next, you’ll be asked to define the campaign’s buying type. If you are starting out, we recommend leaving Auction selected, as it is a common industry default.
Objective
Then comes the objective. Your campaign objective should align with your business goal and the customer’s position in the funnel.
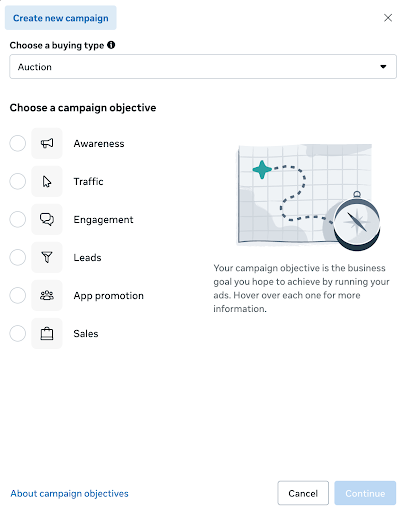
Here is a short explanation of each so that you can decide what best fits your needs:
- Awareness / Traffic: best for getting discovered and building early attention.
- Engagement / Leads: best when people know you and you want inquiries or sign-ups.
- App Promotion / Sales: best when users are ready to buy or complete checkout actions.
If you want Facebook advertising services for lead generation, start with Leads (or Sales if you already have strong website conversion tracking).
4. Campaign Settings
Right after you start creating a campaign, Meta may show a few optional settings, such as Advantage+ Campaign Budget, A/B testing, and Special Ad Categories.
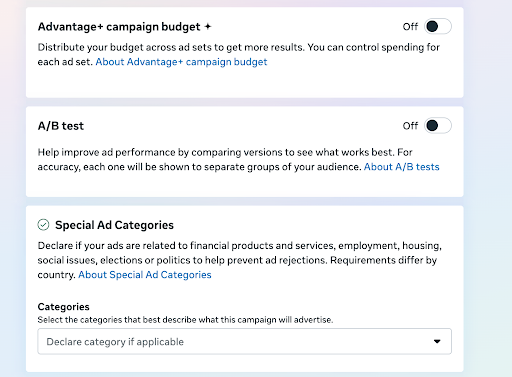
Here is what each option means in plain language, so you can choose what makes sense for your goals.
- Advantage+ Campaign Budget lets Meta’s system distribute more budget to the ad set it believes will perform best. If you want tighter control while learning, leave it off initially.
- A/B testing compares two versions of an ad to see which performs better, but it’s optional for your first launch. Start simple, collect data, then test once you’re confident.
If your business falls under a Special Ad Category (for example, certain regulated industries), declare it properly to avoid rejections or issues with your Facebook advertising down the line.
5. Build Your Ad Set
The ad set is where you decide how your campaign runs: performance goals, budget, schedule, and who sees it.
Campaign Goals

Your performance goal helps Meta understand what result to prioritize. You can also set a cost-per-result goal to guide delivery toward a target cost (similar to a bid target in search ads on Google).
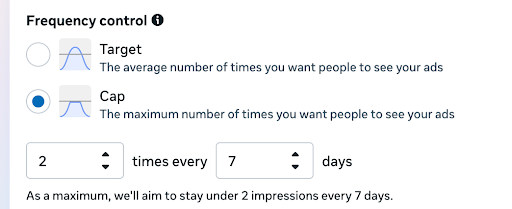
Frequency, Dynamic Creative & Budget
Use Frequency Control to limit how often the same person sees your helpful to help optimize your budget when targeting small local audiences in the Greater Toronto Area.
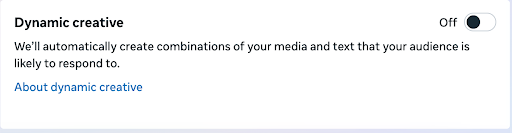
Consider Dynamic Creative when you have multiple headlines, images, and descriptions. You will provide the assets, and Meta finds the best combinations.
For budget types, daily budgets are better for evergreen campaigns, while lifetime budgets work for fixed schedules and end dates.
Choosing between the two will depend on factors such as whether you are considering ads for seasonal sales or more evergreen content, whether you plan to change your budget frequently or keep it stable, and more.
6. Target the Right Audience
Audience Controls
Audience targeting is where many beginners get stuck. The basic factors you can use in Facebook Ads to target your audience are: location, age, gender, and interests/behaviors.
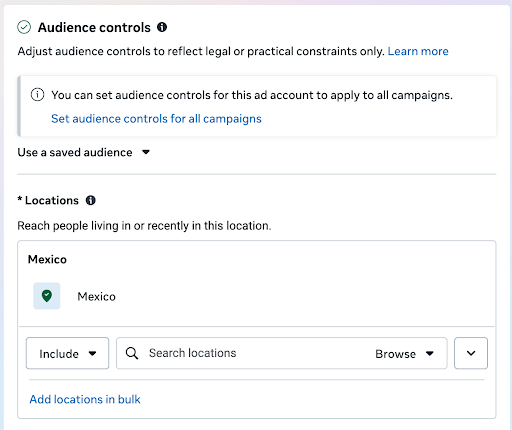
Meta’s Audience Controls help you set location, minimum age, and language, while additional targeting options (including more detailed settings) are available in Advantage+ audience settings.
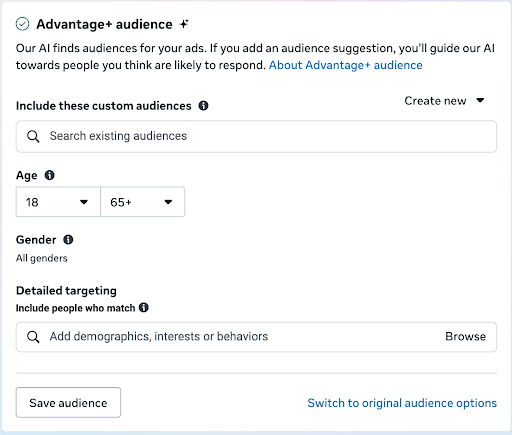
Advantage + Audiences
On the Advantage+ audience section, when clicking the “Create New button, You’ll also pick from two powerful audience types:
- Custom Audiences, which are useful for retargeting leads/visitors, and are often pixel-based. Pixel is a piece of code that helps track conversion from your ads to your website, similar to a Google Tag on Google Ads. You can read more on tracking below
- Lookalike Audiences are groups of people who are similar to your current customers/leads. It will be useful as you start getting data and conversions from your ads.
Detailed Targeting
Detailed Targeting lets you define your audience by demographics, interests, and behaviors. You can either type in specific categories or use the drop-down menus to explore predefined categories.
You can also use “include” (AND) and “exclude” (OR) logic rules to precisely narrow down your audience.
Beginner’s Tip: Don’t stack too many detailed targeting layers in one ad set. Doing so makes it hard to pinpoint which interest or behavior is working in your favor. If you want to test different groups, create separate ad sets with distinct audiences.
Audience Definition
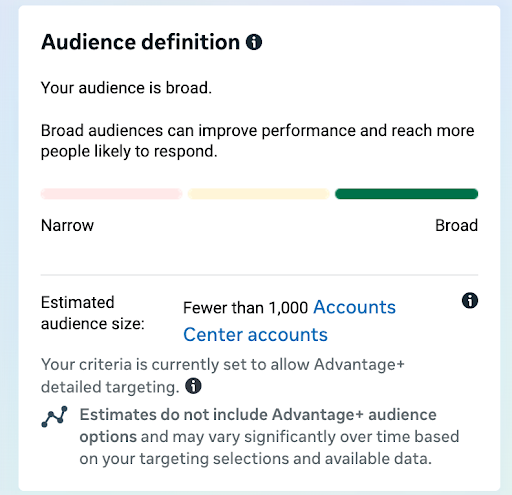
The Audience Definition panel on the right shows the estimated size of your target audience based on the targeting options you have selected. The Estimated audience size forecasts the reach you might get based on your daily budget. Whether it is a good or bad number depends on who you are targeting and whether your business is more niche or mass-market. Keep in mind that these numbers are estimates, not guarantees, and actual performance may differ.
7. Choose Placements
Placements control where your ads appear across Meta’s network. You’ll typically see two options: Advantage+ placements or manual placements.
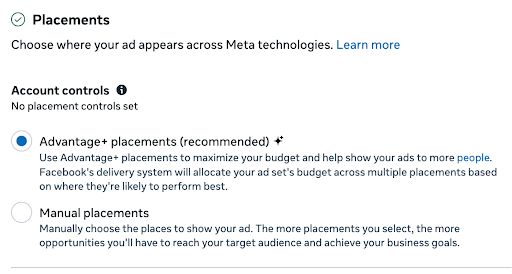
If you’re new, Advantage+ placements are usually the best place to start. Manual placements can get confusing fast, and you may accidentally exclude placements that bring leads or include ones that waste spend.
A practical approach is to run Meta’s Advantage+ placements for at least a week, then switch to manual placements once you have enough data to justify it.
This is a core principle for online marketing workflows: simplify first, optimize later.
8. Create the Ad
There are many settings in the Ad creation section; some will vary depending on the campaign objective and other options you chose before.
Ad Set up
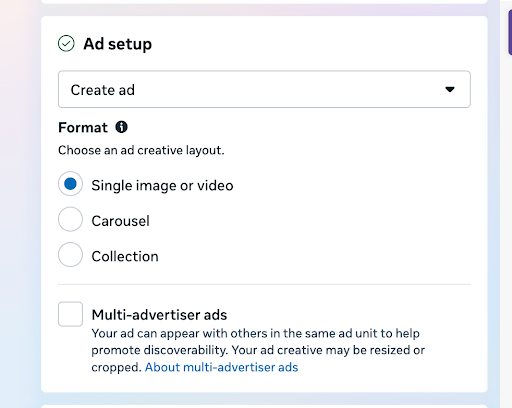
Creative
Designing a Good creative is vital to the success of your campaign, so it is a very important part of the ad creation process.
For media, you can use photos from your Page, but designing media specifically for paid ads is usually better. If you do not know where to start, tools like Canva work well for beginners.
Here are some practical Facebook ads design tips for higher conversions: Use one clear focal point, keep text easy to read on mobile, and make sure the offer or benefit is obvious within the first second of viewing.
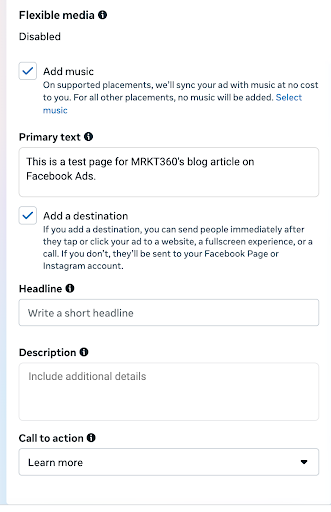
For copy, as Facebook ads have evolved, Meta has simplified copy to a single “Primary Text.” However, depending on the placement and if you set a destination, you’ll also need to provide a Heading, a Description, and a Call to action (as shown in the screenshot above).
The important thing is to keep the copy short and to the point, and focus on one single message. For example, one offer, one pain point, and one next step.
A quick Facebook ad copy and design tip is to use this formula:
Problem → Benefit → Proof → Action.
This keeps your Facebook advertising readable and conversion-focused without sounding too “salesy.”
For music, be careful, as it is Facebook’s AI that is choosing for you. It might pick something that doesn’t suit your ad’s vibe. So we recommend having it off by default or adding music directly to your media.
9. Set the Destination
Destination and CTA
Meta may keep “Destination” off by default, but it’s critical: it tells Meta where people should go after clicking (for example, a website, landing page, etc.). You can first turn it on in the Media section.
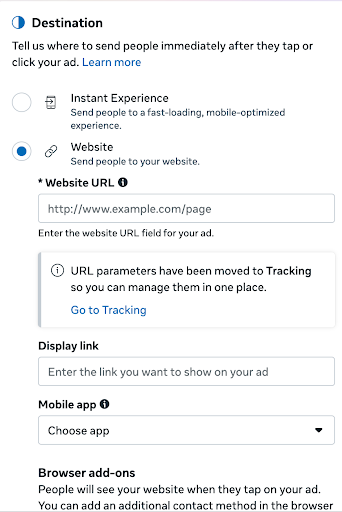
Treat the ad as the start of the journey and your landing page as the conversion point. If your goal is leads, your destination should be a focused page that matches the promise of the ad.
Enable clear CTAs so people take the next step (visit your site, call, book). Otherwise, they may stay on Facebook and never convert, a mistake that is common in local campaigns.
10. Enable Tracking & Measure Conversions Accurately
Last but definitely not least, make sure your website event tracking is set up before you publish.
In most cases, this means installing the Meta Pixel on your website and confirming it is firing correctly.
Pixel
Pixel is a small tracking script that helps Meta understand what people do after they click your ad, such as viewing a key page, adding to cart, or submitting a lead form. When it is working, you can optimize campaigns for real outcomes instead of just clicks, build retargeting audiences from site visitors, and measure performance more accurately in Ads Manager.
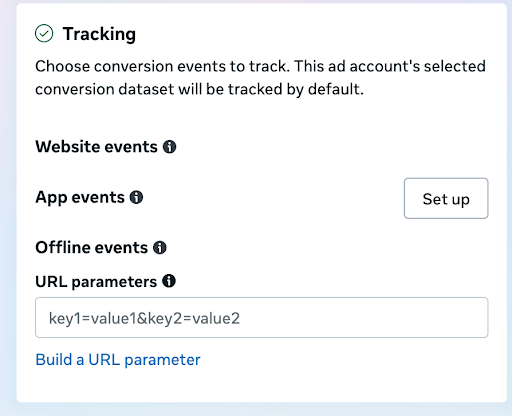
Events
If it applies to your business, you can also set up app events and offline events. App events track actions inside your app, while offline events help connect ad engagement to in-person sales, phone orders, or CRM-recorded conversions.
Finally, add unique URL parameters, such as UTM tags, to your destination link so you can identify visitors and conversions from this specific ad in Google Analytics or other reporting tools. This makes it easier to compare creatives, understand what is driving results, and scale the winners.
11. Publish, Monitor, and Start Optimizing
Once you hit public, congratulations, your ad is live! From here, your goal is to collect enough performance data to make informed improvements.
As results come in, that’s when you start experimenting with A/B tests, improving audiences, refining placements, and adjusting creatives.
This is where many brands shift from just “running ads” to real digital marketing: consistent testing and iteration. If you prefer hands-off growth, managed Facebook ads services from an expert agency like MRKT360 can handle setup, creative testing, and optimization while you focus on operations.
Quick Recap
Below is a brief summary of the steps covered today for launching your first Facebook ads campaign:
- Create a Business Suite account + Facebook page
- Open Ads Manager and add payment Info
- Create the Campaign + the right objective
- Choose the right Campaign settings
- Building the Ad Set
- Targeting the right people
- Placements left on Advantage+
- Ad creative built + copy written
- Destination + CTA
- Enable tracking to measure correctly
- Published ads + constant optimization
Need Help Running Facebook Ads in Toronto?
If you want a team to plan, build, and optimize campaigns without trial-and-error, MRKT360 is a Toronto-based digital marketing firm offering Facebook advertising services and broader digital marketing services, everything from strategy to creative to reporting.
As a Facebook marketing agency with Facebook partners‘ expertise, we can help you turn ad spend into consistent lead flow with structured testing, smarter targeting, and creative built for performance.
Do not wait any longer. Schedule a consultation today.
About MRKT360
MRKT360 is a results-driven digital marketing and solutions agency offering end-to-end services in performance marketing, AI strategy, SEO, GEO, paid media, and IT optimization.
With clients around the world, MRKT360 specializes in future-proofing brands through innovative solutions that align marketing and infrastructure.
FAQs
You can start small. Many beginners see results with a modest daily budget while testing creatives and audiences, then scale once they know what works.
Not always, but it helps. You can run lead form or message ads directly on Facebook, but a focused landing page usually delivers better lead quality and tracking.
Yes. The Meta Pixel allows Facebook to optimize for real actions like leads or sales, build retargeting audiences, and measure performance accurately instead of guessing.